
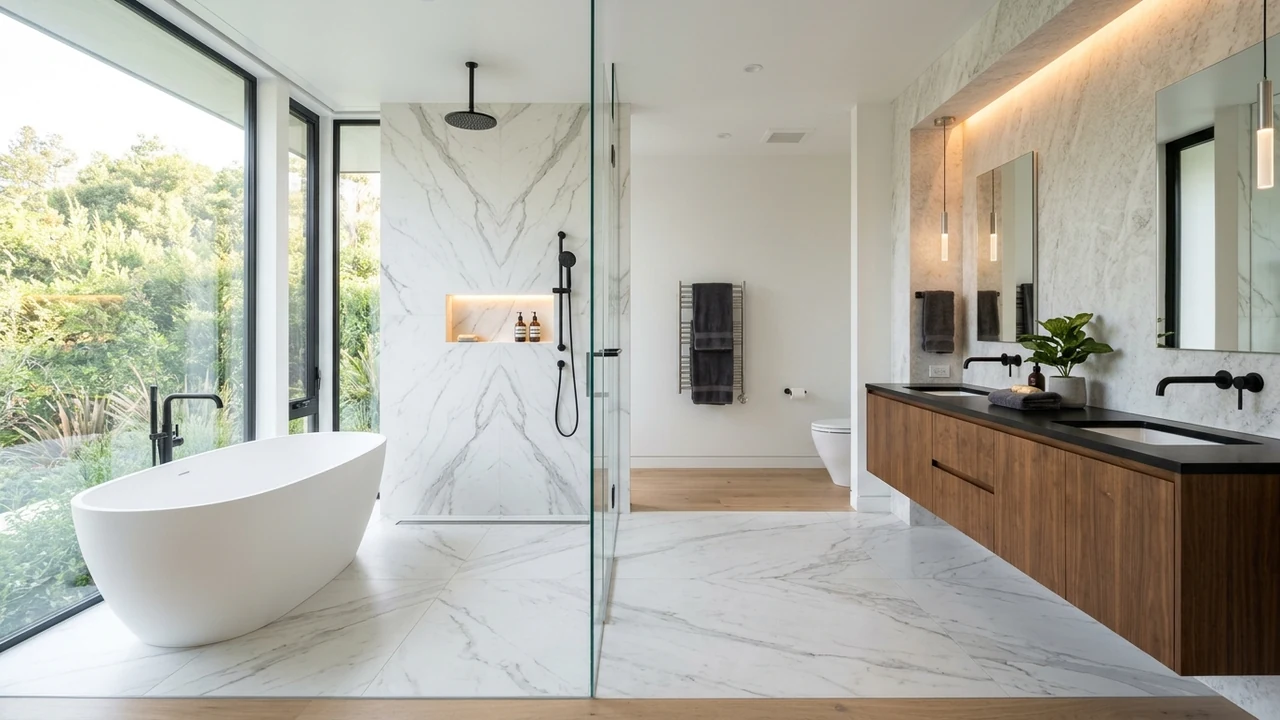
Across the San Francisco Bay Area and Northern California, the primary bathroom has undergone a profound architectural shift. Homeowners are replacing dated, compartmentalized 1980s fiberglass alcoves, oversized whirlpool deck tubs, and high-curb tiled enclosures with expansive, spa-caliber sanctuaries. At the centerpiece of nearly every modern luxury remodel is the zero-threshold curbless shower paired with large-format porcelain slabs, concealed linear trench drains, radiant heated floors, and thermostatic digital shower valves.
However, executing primary bathroom suite transformations with curbless showers, waterproofing systems, and luxury fixture integration is one of the most technically demanding disciplines in residential construction. Unlike a traditional four-inch mortar curb that acts as a physical dam to contain standing water, a zero-threshold curbless shower relies entirely on subfloor structural engineering, exact compound drainage slopes, and 100% monolithic sheet-membrane waterproofing. A single 1/8-inch framing miscalculation or pinhole membrane defect can lead to catastrophic subfloor rot and downstairs ceiling damage.
In this comprehensive construction guide, AR Construction Development details how licensed California design-build contractors engineer bulletproof curbless wet rooms and luxury primary bath suites.
1. Structural Engineering for True Zero-Threshold Curbless Showers
To achieve a seamless, flush transition where bathroom floor tiles flow directly into the shower enclosure without a step or lip, the contractor must create vertical elevation space for the sloped mortar bed or prefabricated foam pan beneath the finished tile plane. By California Plumbing Code (CPC), a shower pan must maintain a consistent pitch of 1/4 inch per linear foot (2% slope) toward the drain outlet.
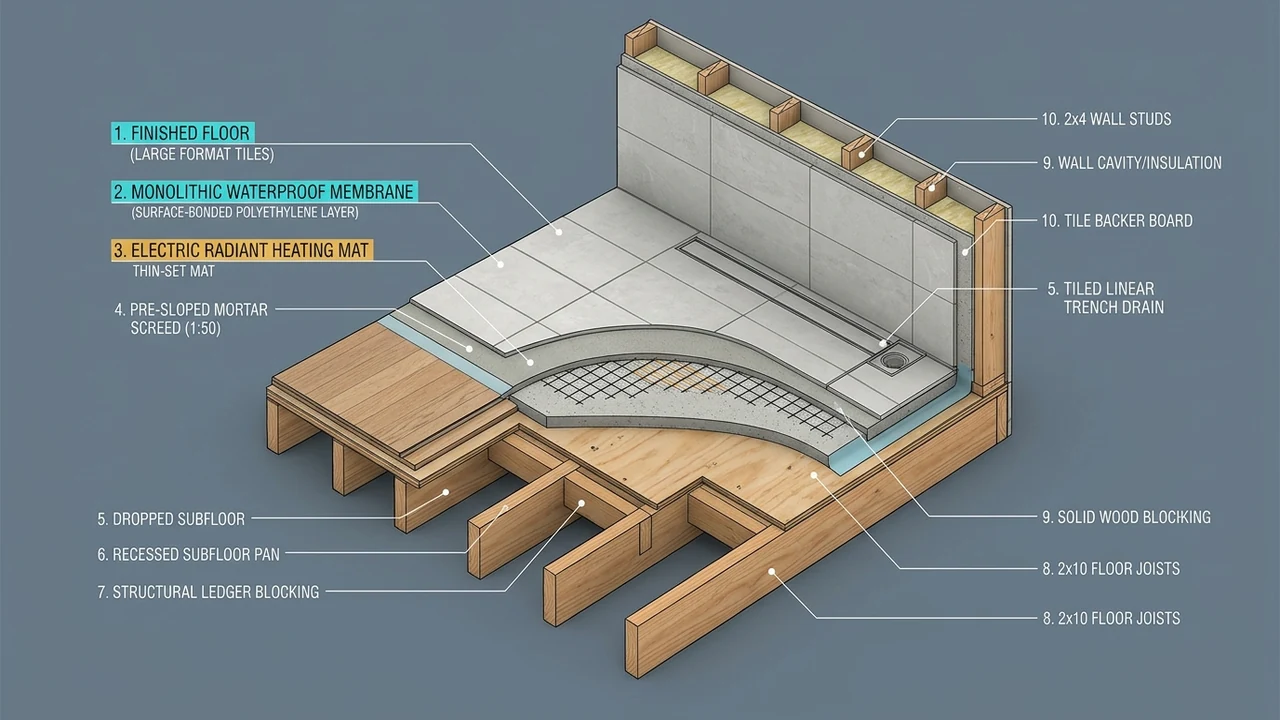
Subfloor Recessing Over Wood Joist Framing
In homes framed over a crawlspace or second story with 2×10 or 2×12 floor joists, our framing carpenters carefully remove the existing 3/4-inch plywood subfloor inside the shower footprint. Rather than cutting or notching structural joists – which compromises load capacity – we install engineered 2×4 ledger cleats and structural blocking flush between the joists, dropping new 3/4-inch marine-grade plywood down between the framing members. When required by span calculations, we sister full-length engineered LVL or Douglas Fir joists alongside existing framing under structural engineering supervision.
Slab-on-Grade Concrete Trenching
For single-story Northern California homes built on concrete slab foundations, creating a curbless entry requires saw-cutting and jackhammering the shower zone 2.5 to 3.5 inches into the slab, relocating the 2-inch ABS P-trap to the linear drain position, and pouring a recessed structural mud bed.
2. Linear Drains vs. Four-Way Point Drains
Traditional center point drains require the shower floor to slope inward from all four walls like a bowl, which restricts the floor to small 2×2-inch mosaic tiles that can conform to compound curves. Modern primary suites overwhelmingly utilize stainless steel wall-to-wall linear trench drains positioned along the back wall or shower entry line.
- Single-Plane Slope Geometry: Because a linear drain spans the entire width of the shower stall, the floor pitches in a single flat plane toward the trench. This allows installers to continue massive 24×48-inch or 36×36-inch large-format porcelain or natural stone tiles seamlessly from the main bathroom floor right into the shower without awkward diagonal relief cuts.
- Tile-In Concealed Grates: Using a frameless “tile-in” drain channel insets a matching strip of your floor stone inside the drain trough, leaving only a sleek 3/16-inch perimeter slot visible where water vanishes effortlessly.
3. Monolithic Sealed Waterproofing Systems (ANSI A118.10 Compliance)
Ceramic tile, porcelain, and grout are water-resistant surfaces – they are not waterproof. Moisture inevitably migrates through microscopic capillaries in cementitious or epoxy grout lines. Traditional hot-mopped asphalt pans or PVC liners placed under thick mortar beds allow the mortar bed to stay permanently saturated with stagnant water.
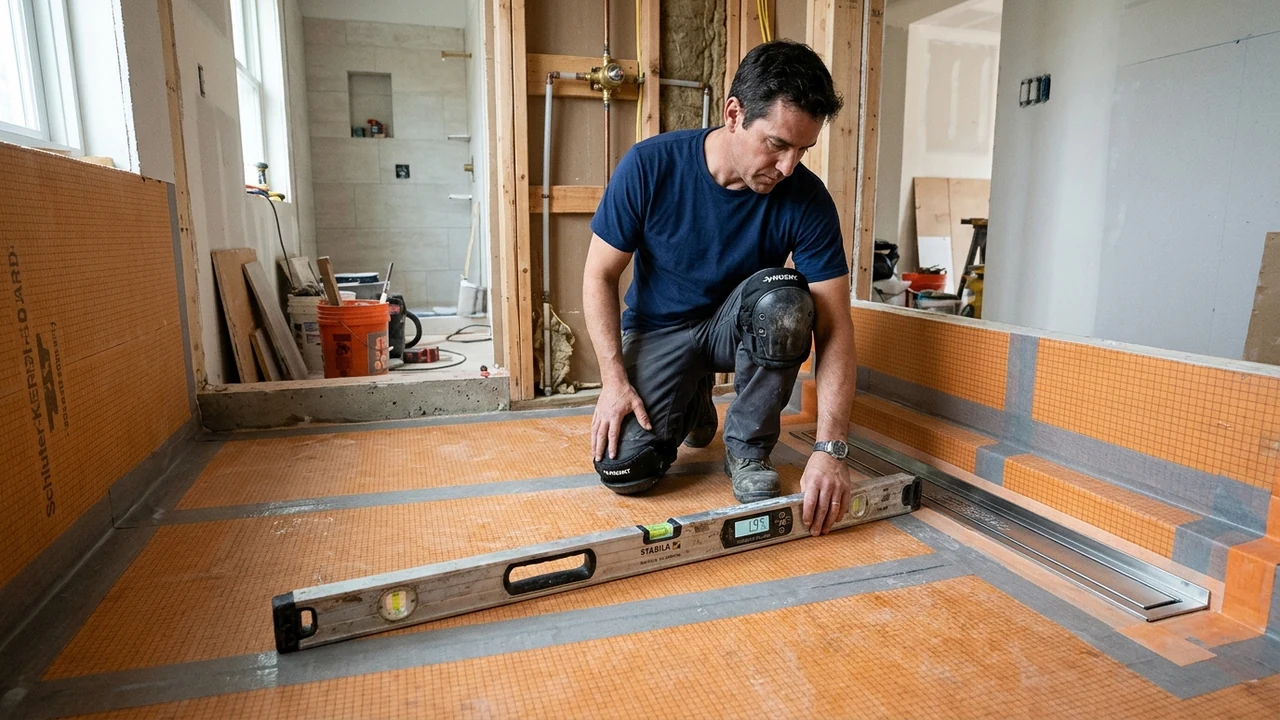
At AR Construction Development, we construct 100% surface-bonded, closed-cell waterproofing envelopes (utilizing industry-leading systems such as Schluter Kerdi, Laticrete Hydro Ban board, or Wedi):
- Vapor-Tight Wall & Floor Encapsulation: Closed-cell extruded polystyrene waterproof backer boards or polyethylene sheet membranes are bonded directly beneath the tile thin-set layer across the entire shower floor, extending up the walls past the showerhead height and out onto the main bathroom floor outside the glass door.
- Capillary Break at the Shower Threshold: We engineer a hidden stainless steel profile and elastomeric sealant dam along the glass line so moisturewicking through thin-set mortar can never migrate outward into the dry bathroom vanity zone.
- Mandatory 24-Hour Flood Test: Before a single tile is set, we plug the drain pipe below the clamping ring, fill the waterproofed pan with water, mark the water line with a laser, and verify zero drop over 24 hours alongside the municipal building inspector.
4. Electric Radiant Floor Heating and Luxury Fixture Integration
A true luxury primary bath coordinates mechanical rough-ins down to the millimeter during framing:
- Uncoupled Electric Radiant Floor Heating: Low-profile heating cables are snapped into uncoupling membrane mats beneath the main bathroom floor AND inside the curbless shower bench and floor (wired to a dedicated GFCI-protected programmable smart thermostat with an in-slab thermal sensor), warming cold stone surfaces to a cozy 82°F every morning.
- Thermostatic Multi-Outlet Digital Shower Valves: High-flow 3/4-inch thermostatic rough-in valves deliver balanced pressure and exact degree-level temperature control simultaneously to ceiling-recessed rain heads, wall body sprays, and handheld wands.
- In-Wall Concealed Cistern Wall-Hung Toilets & Freestanding Wet-Room Tubs: Framing 2×6 plumbing walls accommodates concealed carrier frames for floating wall-hung bidets/toilets and floor-mounted freestanding tub fillers with concealed subfloor access panels.
- Recessed LED Linear Niche & Mirror Lighting: Mitred porcelain shower niches fitted with waterproof IP67 24V linear LED channels cast warm, glare-free illumination across custom woodwork and stonework.
Frequently Asked Questions
Does water splash out of a curbless shower onto the rest of the bathroom floor?
Not when properly engineered. By sizing the wet zone to at least 42 to 48 inches deep, positioning rain heads and wall jets away from the open entry, and maintaining a strict 1/4-inch-per-foot pitch toward a high-capacity 2-inch linear drain, water is evacuated faster than the showerhead can deliver it.
How much value does a luxury primary bathroom remodel add in Northern California?
In the Bay Area, an architecturally cohesive primary suite featuring a zero-threshold curbless shower, double floating vanity, and modern waterproofing consistently yields one of the strongest resale returns while providing future-proof universal design (aging-in-place) accessibility.